NOTE: this blog and the associated code was written with an early version of the Rx assemblies. I have updated the code to work with the latest and it’s available on my SkyDrive site here
I heard about the Rx Framework some time ago. I even watch a few of the many videos from the team posted (mostly) on the Channel9 website, but I only started investigating the Framework very recently.
The first app I created simply wrote out a list of numbers to a console window.
using System;
using System.Linq;

namespace Demo1
{
    public class DemoClass
    {
        public void Test1()
        {
            var enumerable = Enumerable.Range(1, 100);
            var observable = enumerable.ToObservable();
            observable.Subscribe(Console.WriteLine);
        }
    }
}
Ok, not the most inspiring application, but illustrates the use of ‘Observable’.
I read a series of (5) posts by Matthew Podwysocki (this link is to Part 5 and references all the others) where he talked about monitoring mouse events to create a simple ‘etch-a-sketch’ like application so after first writing a simple application to try it out I set about creating a fully working application.
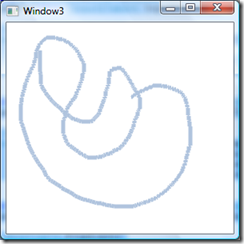
So in the few hours between takeoff and landing on a transatlantic flight, I set about creating the app. I decided that I would first-off create a version without Rx, handling the mouse events in the ‘normal’ way. This actually wasn’t that hard and I was a little surprised at how easy it was. (BTW – this is Demo3 in the source code.)
The app.xaml and window3.xaml files are what was created by the project. All the really useful code is shown below.
using System.Windows;
using System.Windows.Input;
using System.Windows.Media;
using System.Windows.Shapes;

namespace Demo3
{
    /// <summary>
    /// Interaction logic for Window1.xaml
    /// </summary>
    public partial class Window3 : Window
    {
        public Window3()
        {
            InitializeComponent();
        }

        bool Capture = false;
        bool FirstPosition = true;
        Point LastPosition = new Point(0, 0);

        private void Window_MouseLeftButtonDown(object sender,MouseButtonEventArgs e)
        {
            Capture = true;
            FirstPosition = false;
            LastPosition = e.GetPosition(mainCanvas);
        }

        private void Window_MouseLeftButtonUp(object sender, MouseButtonEventArgs e)
        {
            FirstPosition = true;
            Capture = false;
        }

        private void Window_MouseMove(object sender, MouseEventArgs e)
        {
            Point pt = e.GetPosition(mainCanvas);
            if (Capture)
            {
                if (FirstPosition == false)
                {
                    var line = new Line
                    {
                        Stroke = Brushes.LightSteelBlue,
                        X1 = LastPosition.X,
                        X2 = pt.X,
                        Y1 = LastPosition.Y,
                        Y2 = pt.Y,
                        StrokeThickness = 5
                    };
                    mainCanvas.Children.Add(line);
                }
                LastPosition = pt;
                FirstPosition = false;
            }
        }
    }
}
I then set about repeating the process using Rx. This was a little harder; simply because it was new, but the end result is quite elegant. The resulting app is exactly as shown above but with the following code…
using System;
using System.Collections.Generic;
using System.Linq;
using System.Windows;
using System.Windows.Input;
using System.Windows.Media;
using System.Windows.Shapes;

namespace Demo2
{
    public partial class Window2
    {
        private void InitializeMouseDraw()
        {
            var mouseMoves = from mm in mainCanvas.GetMouseMove()
                                 .SkipUntil(mainCanvas.GetMouseLeftButtonDown())
                                 .TakeUntil(mainCanvas.GetMouseLeftButtonUp())
                             let location = mm.EventArgs.GetPosition(mainCanvas)select new { location };

            var mouseDiffs = mouseMoves
                .Skip(1)
                .Zip(mouseMoves, (l, r) => new { X1 = l.location.X, Y1 = l.location.Y,
                                                 X2 = r.location.X, Y2 = r.location.Y })
                .Repeat();

            var mouseDrag = from md in mouseDiffs
                            select md;

            var mouseSub = mouseDrag.Subscribe((item) =>
            {
                var line = new Line
                {
                    Stroke = Brushes.LightSteelBlue,
                    X1 = item.X1,
                    X2 = item.X2,
                    Y1 = item.Y1,
                    Y2 = item.Y2,
                    StrokeThickness = 5
                };
                mainCanvas.Children.Add(line);
            });
        }
}
}
The code above reads like it works…
var mouseMoves = from mm in mainCanvas.GetMouseMove()
                                 .SkipUntil(mainCanvas.GetMouseLeftButtonDown())
                                 .TakeUntil(mainCanvas.GetMouseLeftButtonUp())
                             let location = mm.EventArgs.GetPosition(mainCanvas)select new { location };
A sequence of ‘mouseMoves’ are generated only after the left button is down and stop when it is up. The next piece then combines each ‘mouseMove’ with the previous one, using ‘Zip’, but ‘Skips’ the first one. This creates a sequence of ‘mouseDiffs’ which simply defines the start and end of a line to be drawn. The ‘Repeat’ does exactly that.
var mouseDiffs = mouseMoves
                .Skip(1)
                .Zip(mouseMoves, (l, r) => new { X1 = l.location.X, Y1 = l.location.Y,
                                                 X2 = r.location.X, Y2 = r.location.Y })
                .Repeat();
The final piece of code simply creates the line and draws it on (adds it to) the canvas.
This code isn’t really hugely different to the previous code but I needed to add a few EventExtension Methods to really make the code concise.
public static class EventExtensions
{
    public static IObservable<IEvent<MouseEventArgs>>
        GetMouseMove(this IInputElement inputElement)
    {
        return Observable.FromEvent(
            (EventHandler<MouseEventArgs> genericHandler) =>
                new MouseEventHandler(genericHandler),
                        h => inputElement.MouseMove += h,
                        h => inputElement.MouseMove -= h);
    }

    public static IObservable<IEvent<MouseButtonEventArgs>>
        GetMouseLeftButtonDown(this IInputElement inputElement)
    {
        return Observable.FromEvent(
            (EventHandler<MouseButtonEventArgs> genericHandler) =>
                new MouseButtonEventHandler(genericHandler),
                        h => inputElement.MouseLeftButtonDown += (h),
                        h => inputElement.MouseLeftButtonDown -= (h));
    }

    public static IObservable<IEvent<MouseButtonEventArgs>>
        GetMouseLeftButtonUp(this IInputElement inputElement)
    {
        return Observable.FromEvent(
            (EventHandler<MouseButtonEventArgs> genericHandler) =>
                new MouseButtonEventHandler(genericHandler),
                        h => inputElement.MouseLeftButtonUp += h,
                        h => inputElement.MouseLeftButtonUp -= h);
    }
}
I finally decided to add a little ‘colour’ in Demo4. I found a ColorPicker control and adapted it so that you can now draw in colour and change the width of the line.
I haven’t really tested the Save and Open code, but Clear works!
(Demo6 is just a test app for the ColorPicker control.)
All the sample projects are here; enjoy.

